How to Create a Company Profile in Hi Accounts application
After activation of the Hi Accounts software application the first thing we need to do is to setup a company. Many software have its own design and flow to complete the Company profile. It is very simple and easy using Hi Accounts to create a Company Profile including the GST information with other ledgers associated.
Here I will explain with the step by step procedure to create a Company profile in Hi Accounts Software Application with the screen shots.
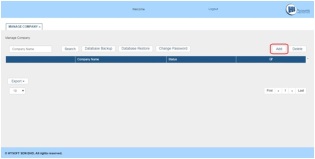
- Launch the application, click on Manage Company.
- Provide username as- admin and password as- admin. Then click on Submit button.

- Click on Add button in the Manage Company page.
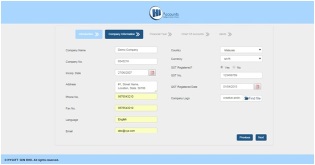
- Provide The Company Name, username, password and your valid email ID. Then click on Create button.

- Company configuration starts from here. Click on Next button.

- Provide the company details with GST number and GST registration date and click on Next button.
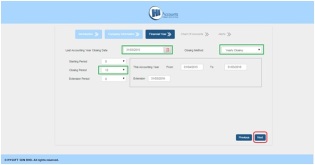
- Provide the Last accounting year closing date, closing method and
number of periods (Months). The current Accounting Year date will
automatically set. Click on Next button.
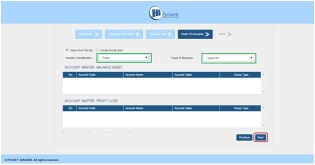
- Select Industry Classification and type of Business. Related ledgers will be created and listed below. Click on Next button.
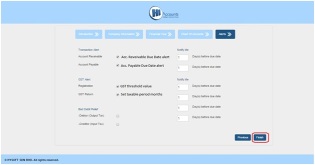
- Select the checkbox to get the alerts in the preferred due dates. In
GST Return if you are returning monthly then select 1, else if you are
returning every three month once select 3, else if you are returning
every 6 months once the select 6. And click on Finish button.
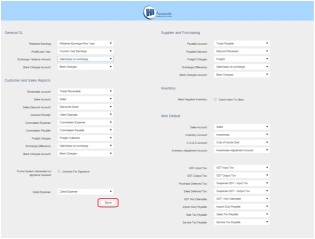
- Here account types are all set appropriately, still if you need to
change then click on dropdown and select the type. And at the end click
on Save button.
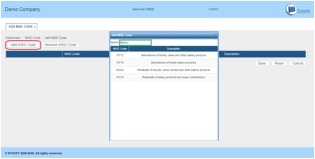
- A MSIC code is needed to specify the business category. Click on Add
MSIC Code, search by appropriate keyword and select the MSIC code.
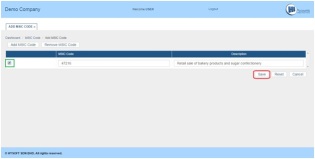
- After selecting the MSIC code, click on the checkbox and click on Save button.
- The configuration Company is completed. You are redirected to Authentication Page. Here select your company as shown below.
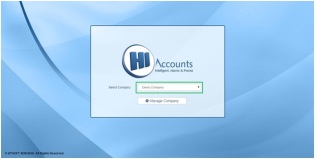
- Input your username and password, which was created during the company setup. And click on Submit button.

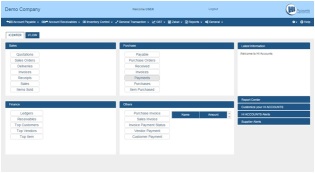
- Home page will be opened from here you can proceed with the application.


Online Chat Consultant is available, visit our website: http://www.hiaccounts.com/
For free video tutorials visit: http://www.hiaccounts.com/tutorial.html/
No comments:
Post a Comment